View
Creating & Editing Views
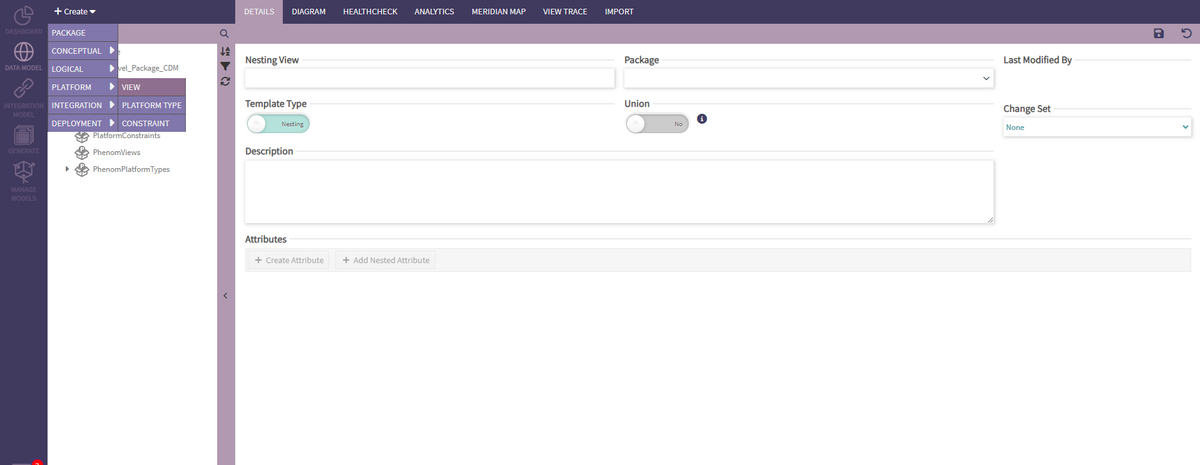
To create a View, select the corresponding option from the Create > Platform dropdown menu.
The only field required to save a new view is a valid and unique name.
If you want the view to be saved in a package other than the default option, choose a package in the Parent Package dropdown, which defaults to the PDM package currently selected, or PhenomViews.
A view can be Nesting or Composite. The toggle may lock depending on the view field contents.
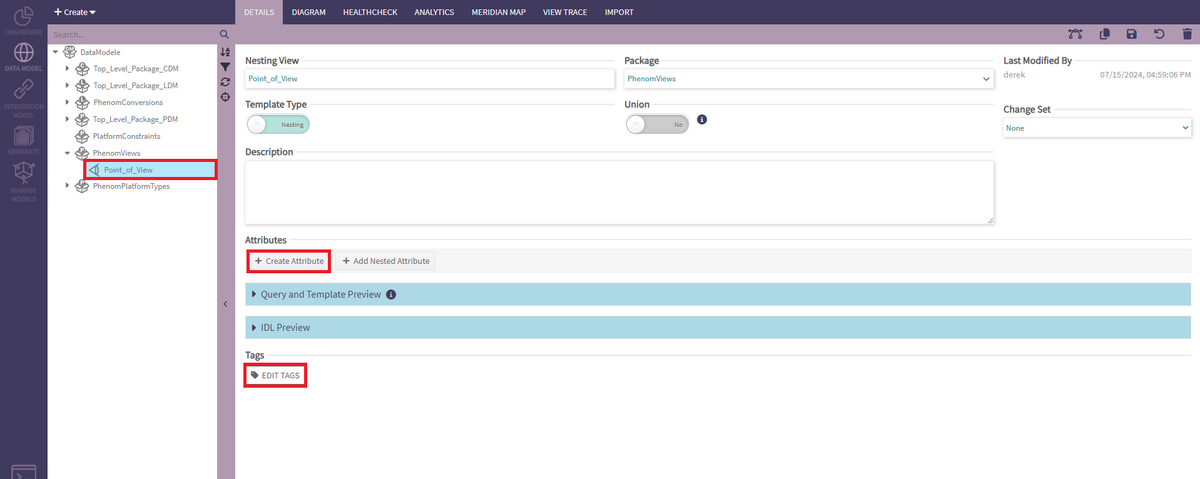
Once the View has been created using the Save button in the top right corner, the user will be able to add View Attributes and tags to it.
Composite Views
A Composite View allows the user to declare that a given template is intended to be a composite template. In a Composite View, all view fields must:
- Be nesting fields
- Point to views that have a uniform projected characteristic across all of their internal fields
Nesting Views
A Nesting View allows the user to add both nesting and non-nesting fields. In a Nesting View, all view fields must:
- Point to a view that has a uniform projected characteristic across all of its internal fields.
Managing View Characteristics
View characteristics can be added to Views via the "Create" and "Add Nesting" buttons in the Attributes section. The "Create" button will redirect the user to View Attribute details page and the "Add Nesting" button will add a row to the table for inline editing.
After adding view characteristics, they will show up in the Attributes table. For each row, the user can click on the following links:
- Name: link to the View Attribute's page
- Measurement/View: link to the Measurement's or nested view page
- Path/Perspective: link to any of the path hop's page
- Semantic Matches: opens the Semantic Matches dialog with semantic matches to the selected view characteristic.
The view characteristics can be reorganized in the table by dragging and dropping the rows into a desired order:
- Simply select the row and drag it:
- Hover the selected row over its destination and release it:


